Architectures for Constituent Portals

One of the common needs, or at least desires, for CRM users is to link their CRM to some kind of constituent portal. There are several ways you can architect a good data pattern for your constituent portal. The trick is picking the right one for your organization.

This is the first in a series on what your choices are, and now to select the right one. The architecture you select will drive the implementation cost, maintenance costs, and scalability.

The Purpose of Your Constituent Portal

Before deciding on the architecture of your portal, you need to have a clear understanding of its intended purpose and expected scale. The purpose of the portal will also dictate the direction(s) data flows, and the scale will help you plan the long term costs.

If you can’t clearly state why you need a constituent portal, you don’t need one.

Different organizations have different reasons to create portals. Companies that sell products may want a warranty or support portal. Nonprofits often want a donor portal that provides tax receipts and allowed recurring donors to update their gift information. Member organizations want a place for members to see their benefits, update their information, and renew their memberships. And so on.

The purpose of your portal will determine the direction that data flows through it. There are essentially three directions that data can move.

Outbound Data

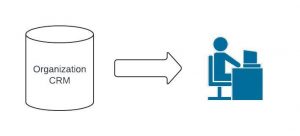
You can send data from your organization to your constituent. That could be things like receipts, memberships status, or product warranty information. Anything that is data you have, that your member might need to see, but not update.

Data Exchange

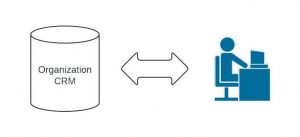
You can allow constituents to update information. That could be address changes, support requests, donation schedule updates, event registration details, and more.

Data Network

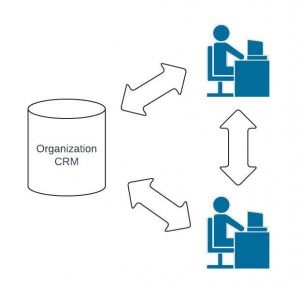
Your third option is to allow you constituents to exchange information with each other. This could be a any form of member community where they engage with each other.

When planning a network, remember you have to plan for content moderation and acceptable use policies.

Primary Portal Data Architectures

To support your portal, whatever the data flow is, there are three main data architectures you can choose from, each which a different strengths and weaknesses. The more complex your architecture the more options you will have for what it can support, but it will also increase costs and maintenance efforts. Bigger is not always better – sometimes it’s just more expensive.

1. All-in-One Constituent Portals

In an all-in-one solution your constituent portal is part of your CRM. For obvious reasons this is the type of portal that your CRM vendor wants to sell you. In Salesforce land this means Experience Cloud. There are also many nonprofit-focused CRMs which include one in their solution. When your portal is part of your CRM you get a bunch of advantages:

  • Data all lives in one place. There is no data sync to worry about setting up or maintaining.
  • You have one vendor. That means you can centralize your support arrangement and billing.
  • They are often fastest to implement. They are designed to be fast to market to help make them the obvious choice.
  • They generally do not require a developer. Again, your CRM vendor really wants you to select this path, so they clear as many hurdles as they can.
  • There is only one technology stack. By leveraging the technology of your CRM your investments in learning that technology carry over, at least in part, to your portal.

There are also downsides:

  • New template system to learn. The CRM’s portal likely has a different template system than the CMS on your main web site. That may be hard to make match your primary online branding.
  • The vendors make a lot of assumptions. To provide that ease listed above they make assumptions about how data flows, security, user experience, and how other elements should work – those assumptions may not match your ideal solution.
  • Costs often scale linearly. There are usually license costs that are scaled based on user count meaning your costs grow as the portal grows at more or less a 1:1 rate. While there are price breaks and other incentives this is the right expectation to have for estimating.

2. External Constituent Portal

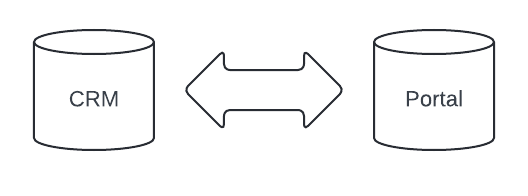
In this pattern an external constituent portal moves the user experience from within your main CRM’s sphere of influence into a separate platform. In my career I’ve mostly built these with Salesforce as the CRM and Drupal as the portal platform – it’s a powerful pairing. The strengths and weaknesses here are more or less the mirror of the all-in-one portal.

  • Your web team may already know the technology. If you use the same technology as your web developers use for your main web site(s) they already know who to handle design and branding.
  • You have greater control over the User Experience. The assumptions that go into the portal are yours not the ones imposed by the CRM.
  • You have greater control over security, along with data flow and formats. Since they aren’t built around assumptions you don’t control you have greater control and freedom.
  • Costs typically grow more slowly. It is less common to have per-user license costs in this context so the cost curve is likely closer to logarithmic.

The downsides:

  • You have to handle data synchronization. The two systems means data has to pass back and forth.
  • You have two different vendors/platforms. When you had one system everything was centralized, now you have two different systems handling constituent data.
  • This design typically is harder to implement. All those short cuts your CRM provider had in mind for you are gone. Even if you use a purpose built solution it’s going to take more time and effort.
  • This approach generally requires a developer and/or data architect. To implement this pattern you need someone who understands both platforms – ideally both for setup and support.

3. External Constituent Portals with Data Proxy

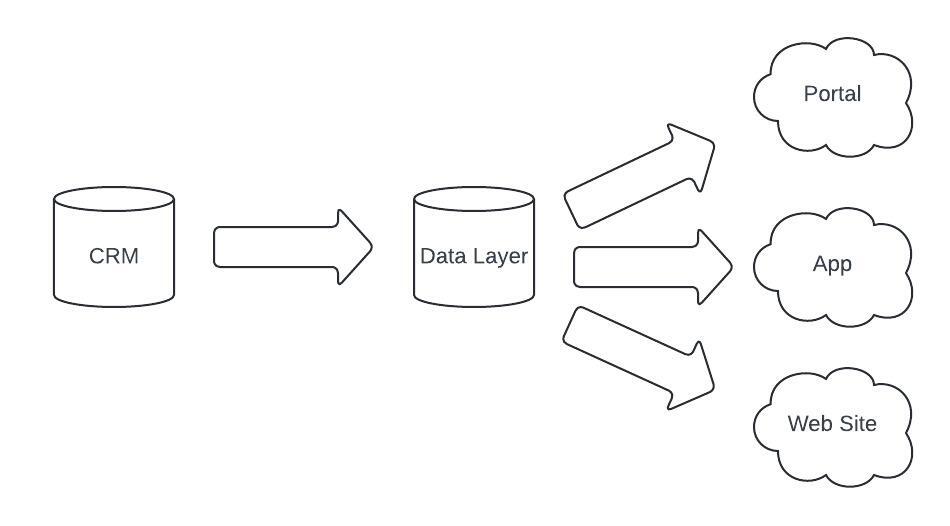
In some situations it makes sense to insert a data proxy, or API layer, between your main CRM and your constituent portal. This creates a layer of abstraction, security, and data augmentation that can benefit a lot of organizations. While this is the most complex of the three main architectures it is one I find is frequently overlooked – in part, I suspect, because no one partner benefits from selling it.

This setup certainly isn’t for everyone, but when it’s the right fit it makes a huge difference. It also creates a significant number of iterations – all of those arrows could be one directional or two directional.

An extra data layer makes the most sense when data from your CRM is going to multiple places and/or needs to be augmented by an external data source. For example think about an organization that provides trail maps for hiking or paddling. All that data geocoding those trails does not need to be in your CRM, but you probably want to know which members are interested in which trails so some trail data is needed there. Meanwhile in public you want a great deal more information all linked together. An organization like that may have a portal for members, a web site to find trails for non-members, apps for iPhone and Android, and perhaps a public API for other people to use to build their own web sites with. That’s a lot of API calls all with different data sets, all of which need to be very fast.

Your CRM is designed to be very stable and reliable – it is not designed to be very fast. What’s more, you often have limits on the number of API calls you get in your package (with extra fees charged if you go over). By inserting another layer between your CRM and other services you can bypass these limitations.

There is another added benefit to this design pattern, and that is increased security. By creating an additional layer in your system you are able to create a separation of concerns between the various systems. Each should have access to only the data is absolutely needs from any of the others.

How to Pick?

There are lots of considerations that go into selecting the right architecture for your project – which is why that’s getting it’s own post soon.

Tips for Salesforce Exams Part 2 – Taking the Exam

This is a second in a two part series on taking Salesforce Certification Exams. We’ll be talking here about taking the exam. You might also find part 1 on studying useful.

For this discussion I’m assuming you have picked your exam, studied as best you can, and now it’s time to take the exam.

Scheduling a Salesforce Exam

In my article on studying I recommended scheduling your Salesforce exam a week or two after you had prepped your flash cards. Of course it’s not exactly that straight forward. You need to pick the location and timing that works to your best advantage.

Location

Salesforce exams can be taken in a testing center or from home. Before COVID I took my exams in-person at a local testing center located at a university – it was re-assuring that if there were issues I could discuss it with staff in person, although it never came up. When COVID arrived, like everyone else, I had to move online – and my local testing center never re-opened to non-students for first health and now security reasons. Currently I’d have to drive over an hour to reach an in-person location so I continue to take mine online. All that is to say I have done both, and both can work just fine.

The exact rules for at home tests have shifted a few times, but generally they have all been reasonable (at least since they dropped the two camera requirement). I do get interrupted by support if there is an internet connection flutter, or if an hour or so in my mind – and more importantly eyes – start to drift a bit. But on the whole my home is less distracting than dealing with the challenges of driving, parking, getting checked in, and all the other logistics of an in-person location. If you have potential distractions in your home, like kids home from school, bad wifi, lack of a room you can close off, and other things those in-person logistics might be a great trade for you.

On the whole, I prefer taking tests from home. That said, the most important thing about the location is that you are comfortable enough about the setting that you can stay focused on the test.

Time

The location you select will drive the dates and times available to you, but both have limited options. Plan ahead if you want a specific time and day – I’ve had to put off exams a week or two just to find a reasonable time of day to take the exam.

For online exams I have found there are 5 times of year to avoid: late December, and late in a Salesforce quarter. December that’s because people who work at partners often have to take one a year and procrastinated. As for the quarters, I think that’s because those same partner companies have exam vouchers that are about to expire so they push people to use them up, and Salesforce staff are meeting performance deadlines. Sometimes, I have no idea what’s driving the demand, but there will suddenly be no open slots.

Generally, you want a time when you’ll be awake and sharp. If taking the test from home, that should also mean it’s a time your home is quiet. Pick a time when your partner, or school district, can watch the kids – or everyone else is sleeping. If you are a night owl, and like taking exams in the middle of the night (US-time at least), you’ll have more choices. Personally I like late morning: I’m through my coffee, dealt with whatever fires have started me day, and still have lots of energy.

Remember Your Basic Test Skills

Most of us took lots of standardized tests in school. The test taking skills you should have been taught for those apply to Salesforce exams. Salesforce exams are, fundamentally, the same things as objective standardized tests you took in school – who knew all those test taking skills would actually be job skills?

Change Answers Carefully

Turns out that the thing about never changing answers is wrong. But that doesn’t mean second guess yourself. Change the answer when you know it’s wrong, if you’re still just guessing move on. Sometimes as you proceed through the exam you’ll notice later questions that give away the answer to one you guessed at – that’s a great time to go back if you marked it or have the time to find it.

Eliminate Wrong Answers and Guess Wisely

Depending on the exam you will have 3 or 4 answers available to you – you are looking for the best fit to the details of the question. Writing wrong answer is incredibly hard, usually some of the wrong answers are really bad. So if the answer isn’t immediately obvious look for a few giveaways to bad answers:

  • Products that don’t exist. If part of the answer is not a thing – that’s not the right answers.
  • Not being part of a pair. Sometimes there are a pair of answers that are very similar, in my experience it’s one of those two so ignore the others. In those pairs the difference is usually from a detail of the question. Go scan for a condition that would trigger one or the other.
  • Answers leveraging information that’s not part of the exam outline: Right answers must be part of the exam outline, wrong answers can include other things. If you’re taking an exam where Person Accounts aren’t part of the outline – the answer with Person Accounts in it is wrong.

If you can cut out the bad answers, and get yourself to a 50/50 guess you’re in a good place on most exams as long as you are not always guessing. Your goal is to pass, a few mental coin tosses that keep you moving will keep you in range. You don’t need 100% to pass, so don’t worry about a few wrong answers. As long as your guesses are rare and you’ve eliminated a few answers, you’re golden.

Answer Every Question

If you have no idea about a question, guess randomly. Just pick an answer that sounds plausible and move on. This is not the SAT where you can lose points for the wrong answer. A right answer is one point. A wrong answer is zero points. A blank is always wrong – and still zero.

Read the Answers First

I don’t do this for all questions, but some questions are long, and include extra detail you don’t need to select the right answer. When I see I long question I read the answers, try to eliminate at least one, and then scan the question for details that matter to the remaining answers. Even if I still read the whole question I am extracting the important bits not all the details of why Cloud Kicks wants to encourage adoption or improve security. More than once I’ve been able to eliminate all but one answer, select it, and move one without even reading the question.

Know Your Timing

Like with so many things in life, timing is important. Before the test starts know how many questions you have and what’s your total time. The test will tell you when you start, but you want to have a sense going in how fast you need to be moving.

Most exams have 60 questions and give you 105 minutes (1 hour 45 minutes). That’s a whopping 1 minute 45 seconds per question (for context on the SAT allots 1 minute 11 seconds for the reading and writing questions, GRE it’s 1 minute 30 seconds). So pace yourself.

The test’s clock, which you can and should hide, is in hours and minutes not total minutes. If you aren’t great at time math on the fly, give yourself markers about where you should be at the 20 (> 1:10 remaining), 30 (>52 minutes remaining), 40 (>35 minutes remaining) question points. I slow down as the test proceeds, so I actually like a larger margin earlier in the test so I can be running over time in late questions.

Note Your Weaknesses

You are given a scratch pad for the exam: either a physical piece of paper in a testing center, or a text box online. As soon as you sense you are struggling use it to record your weaknesses. No details, not whole questions, just topics to study later.

You aren’t allowed to keep or copy the notes directly, so you need tags you can use to memorize enough information to go augment your study later. I usually haven’t needed it, but when I took Integration Architect recently I realized a few questions into the exam there were multiple references to things I hadn’t studied – oops. In my case it was PushTopics and Change Data Capture. I wrote just that much in the notes, so when I got to the end I could quickly memorize the need to create flash cards covering those topics to my deck. I failed my first attempt, augmented my flashcards with the topics I’d missed in my study, and passed easily on the second attempt.

On several other exams where I was close to the line, noting those topics helped me stay calm because I had a plan if I needed to do more prep.

Salesforce Exam Specific Skills

The biggest thing I’ve found that’s Salesforce specific is thinking about the context of the exam to help guide guessing. When guessing, try to think like Salesforce, and know some basic rules for the exam you’re taking:

  • Admin Exam: never say you’d contact support, and always say you’d check the App Exchange.
  • Platform App Builder: never say you’d write code, pick the declarative answer.
  • Platform Developer: You still aren’t calling support, never have a DML in a loop.
  • Architect Exams: use a recent – but not latest – Salesforce technology to solve the problem.
  • AI Exams: Be ethical.
  • Advanced Exams (Advanced Admin, PD II, etc): You might need to contact support to enable features or change settings in rare use cases. Generally know your negative use cases – when not to do something you’d select on the basic exams.

Most Salesforce exams have a similar pattern that can help you guess. Ask around your network for people who have taken the exam you’re attempting.

Generally there are some overall messages Salesforce wants people with that certification to have secured in their heads. Figure out what those messages are, and leverage them to help drive success.

Good Luck!

That’s the advice I have to offer. Good luck on your next Salesforce Exam. And if for some reason you don’t pass the first time, pick yourself up, dust yourself off, and schedule the retake. There’s no way through but forward.

Tips for Salesforce Exams Part 1 – Studying

Salesforce certification exams are a fact of life for many of us in the eco system. Whether you are a consultant who needs to add at least one a year or taking your first exam it’s important to have a plan for how you approach your next test. Getting through Salesforce Exams generally requires a mix of memorization, understanding key concepts, and good test taking skills.

Currently I hold 13 Salesforce certifications and have survived 12 exams to get there (there are a couple two-for-ones to be had among the Architect exams) and I passed all but one on the first try. This is by no means makes me exceptional – my current manager holds somewhere between 35-40 certifications, I lost track a test or two ago – but it does mean I’ve taken enough to develop a routine that works pretty well.

What I’m offering here is an outline to what I do. From talking with friends who have mimicked my routine it seems to work well for others as well.

I should note: I am not a Salesforce Certified Technical Architect (CTA). This guide is not meant to help you pass the CTA exam or project, although it should help you with everything that comes in earlier phases of that journey. If I ever decide to put myself through the CTA process, I expect I’ll write a bit about that process, but in the meantime I’m not qualified to speak to it. I am also not currently on an exam advisory panel – take the exams not write them.

Choosing a Salesforce Exam

Before you can study for an exam, you need to decide which one you’re taking. You want to study for the right exam after-all. When picking exams there are many considerations, but let me dispel a couple myths:

  • There is no one exam that will land you a job. Certification is useful, and for some jobs essential, but employers are looking for more than just certification. So a specific certification might help, but it’s not enough by itself.
  • There is no one path through the collection of certifications. I think historically there might have been a reasonable path through the certifications that made default sense. But at last count there were more than 40 certifications out there. Salesforce adds several a year.

You need to figure out what certification benefits you the most. The benefit could be helping improve you resume. It could be helping your employer land new deals (but make sure they give you tangible credit for helping land those deals). Sometimes your employer told you have to take one this year and just need a pass.

Salesforce Exam Career Tracks

Salesforce organizes certifications by career track. There are exams for admins, developers, consultants, architects, and more. You don’t need to confine yourself to any one of those areas – I have certifications from four categories. The career track the exam is aimed at helps you understand the kind of information you can expect and it’s level of complexity. But you should not use it as your sole guidance.

Administrators are expected to know how to do the work of setting up Salesforce, so the questions are focused on which settings enable which features.

Architects are expected to make strategic decisions about which features to use, so the questions are focused on understanding the when to use a feature based on its technical characteristics. Consultant exams are similarly focused on when to recommend features, but are generally easier that architect exams although they do add in information about understanding the role of a consultant. The nonprofit and education consultant exams also expect you to know information about how those kinds of organizations work.

Developer exams expect you to read and understand Salesforce-related programming languages, know how the code will operate, and what errors to expect. Except for Platform Developer II, which requires a super badge, they do not currently expect you to write code.

Salesforce Exam Difficulty and Pass Thresholds

When you select an exam, you need to understand the intersection of difficulty and the passing threshold. Some exams are just plain harder than others. But Salesforce has internal expectations about ensuring that a reasonable number of people who attempt the hard exams also pass those exams. While I don’t know what those numbers are, the place they are most obvious is when you look at passing threshold.

Each exam has a defined percentage score to pass. When it is in the 70-80% range, you’re looking at an exam where the questions are right about on target for the audience taking that exam to pass at the rate Salesforce wants. When you see thresholds in the 60% range, the test is much harder – so Salesforce lowered the bar instead of making the questions easier.

If you know an area really well, and see a low passing threshold, that’s a great exam to target if you just need to pass one. If you don’t know that area well, be warned that’ll be a hard exam. Conversely, an exam with a high pass threshold has easy questions, which many lull you into a false sense of security as you take the exam.

Associate Exams are designed to have high pass rates. Architect exams are designed to have a lower pass rate. With most exams falling between those two points.

Understanding the required pass threshold can help determine how, and how long, you need to study.

Preparing for a Salesforce Exam

Salesforce exams are a lot like standardized tests from high school: nearly all multiple choice and conquerable if you memorize a bunch of information. It helps to understand why the platform does certain things to support guessing, but mostly you need to know what the system does.

Knowing that, once I’ve selected a Salesforce exam to take, I prepare in two phases:

  1. Review official materials and create flash cards
  2. Study the flash cards

Salesforce provides a break down of the content of each exam in both the exam guide and the official Trailhead Trailmix. In theory they include everything in those you will need to pass the exam – mileage here will vary. The lower the exam level, the better this material. For the architect level exams sometimes there are gaps you’ll need to fill to understand what information they are testing.

My first step in preparing for an exam is to review the exam guide, and all the information on the trailmix. I make my own flash cards from that information and then my second step is to study those flash cards until I take the exam. That’s all there is to it – memorize a bunch of stuff.

Exam Outline

The most important part of the official materials is the Exam Outline. Test creators are required to make sure these outlines are correct. There may be extra information or gaps in the Trailmix, but the outline is required to be complete and correct. Use the outline to help guide you as you create your flashcards.

What About 3rd Party Study Materials?

There are several sources for 3rd party study materials. Usually these services cost a few dollars, and they have what my friends at Salesforce call “disturbingly good” information about the exam content. It’s disturbing to Salesforce cause sometimes it’s often good enough to imply someone violated the rules while taking the exam. These third party materials typically come in three forms: courses, practice exams, and flash cards.

Courses

If the support of a course helps you, great. They don’t help me, like most students I can easily disengage when in online courses. For me, they are a waste of money – and as far as I can tell the success rate of people using just a course to prep is very low.

Practice Exams

Practice exams can be extremely helpful. Until I switched to making my own flash cards I used to use these a lot. Practice exams give you a chance to see questions similar to those you will see on the exam itself. More importantly good practice exams, like the ones from Focus on Force, will give you reference information for where the answer came from in the source documentation. That helps you understand why you were wrong.

You should plan to take the practice exams several times – maybe a dozen or more – before you’re ready for the real thing. You need to take them until you are 10-20% above the pass threshold of the exam. While these exams are often good, they also often a little behind the current Salesforce exam – so you should expect a performance gap between what you scored on the practice exam and what you will score on the real thing.

Flash Cards

Flash cards are, in my opinion, the best solution. I know, we all hate flash cards: they were boring in high school and they are boring now. What they are is effective. If your goal is to pass an exam that requires memorizing a bunch of “stuff” flashcards are where it’s at!

Make Your Own Flash Cards: Yes Really!

I make my own flashcards for most exams. And with one exception I passed on the first try. That exception: I accidentally skipped a section of the prep materials and so was missing several cards I needed.

There are a few reasons I make my own flashcards:

  1. They are cheap: a pack of 100 note cards costs $0.89 at Staples right now. I usually need two packs because I generally create about 120 cards and make a dozen mistakes writing them out so we’re taking $1.78 + tax per exam. The Focus on Force Admin Study Guide,which has their flash cards, currently costs $24 – not at all unreasonable but also way more than a buck seventy eight.
  2. Writing them out helps me remember what I’m reading: This is actually the bigger factor than costs. Writing things down helps us remember stuff. By putting in the effort to figure out what cards I need, and writing them out, I remember the information better. Also a few times I used sets from Focus on Force (they were good), and it was tiring to write theirs out so I printed them – which added costs and effort.
  3. Writing your own allows you to personalize: the sets from Udemy, Quizlet, and elsewhere reflect what anyone might need to learn. When you create your own you include what you need to learn. Sometimes I add a few cards that are things I find along the way that I need in my work and aren’t likely to be on the exam. I almost always leave out some information I already know very well.

Risks

Creating my own flash cards brings it own risk. I do not have the level of insight that the 3rd party content creators have when they create their content. I also risk including extra material I don’t need for the exam or my work, which wastes my time memorizing. Still, on the whole, I favor creating my own flashcards over buying someone else’s.

The Right Amount of Studying

Salesforce Exams are pass-fail. A pass is perfect, and failure is disaster – there is nothing between those two points. That means the ideal amount of studying is when you study just enough to pass the exam by one question.

No one wants to fail an exam because they were unprepared. No one should waste time over studying – we have better ways to spend our time.

I have actually threaded this needle a couple times and passed by a hair’s breath. That is a scary feeling because any good test taker knows generally how it’s going as they proceed. When you’re right on the line it’s hard to know which side you’re on.

I used to study a lot, particularly when I used a practice exam based approach. It worked, but it took a lot of time to take all those practice exams. With the flash-card based approach I take as long as I need to create my flash cards, and once I’m convinced my deck is complete I schedule the exam for a week or two out. For exams with a high pass threshold, or are in an area where I am weak, I give myself two weeks. For exams with a lower pass threshold, particularly if it’s an area of strength for me, one week is plenty. During that time I run through the deck once or twice a day.

By exam day, I’m ready to go. As long as my deck has what I need, I’m good to go.

Taking A Salesforce Exam

Part 2 focuses on exam day, taking the exam itself, and recovering from failure when needed.

Writing for Developers and Consultants: Listening

My first few articles in this series have been focused on the messages we send to others – mostly our written messages. This time I am focusing on Listening as key skills when communicating with others.

Listening is a skill. In general in our lives we are expected to know how to listen, even though most teaching is informal.

If you aren’t listening to your colleagues and clients (friends, family, etc.), which can include reading carefully the materials they write, how can you communicate back to them clearly? And when they can tell you didn’t listen closely, why should they listen to you carefully?

The Importance of Listening

Listening when other people speak, or reading their words when they send you an email or chat message, is how we learn about other people’s needs. As developers and consultants we need to understand the needs of our users and clients. If we don’t understand what they need, we will provide the wrong thing.

Active Listening

Listening is not a passive activity. If you are simply allowing someone’s words to wash over you, but not engaged with their meaning you are missing critical details of what’s being communicated.

Active Listening is a skill you can teach yourself and improve on over time.

When we speak we communicate with more than words. Our body language, tone, pace of speaking, and a host of other details go into how we communicate our message. When we actively listen, we are absorbing all those details to make sure we’re getting the whole message.

Active Listening involves also reflecting back that you’re paying attention to the speaker. You can use your own body language to send none verbal cues that you’re paying attention. You can also make affirming noises, and other auditory markers that you’re following along. And when you start to speak you can paraphrase their comments to demonstrate you understood the previous person’s contributions.

Active Listening in an Age of Video Meetings

Most materials you’ll find on Active Listening focus on in-person discussions. That’s in part because people have been talking about Active Listening for decades and the technology is still playing catchup.

But you can bring Active Listening skills to video meetings — most easily if you have your camera on.

While affirming noises and other auditory responses can cause audio filters to struggle – clipping one speaker’s audio to provide your supportive sounds – there are still ways to make sure people know you’re listening. When you camera is on, looking at the screen closest to your camera, nodding or shaking your head, making (work place appropriate) hand gestures, and other visual cues can be helpful. Using the reactions features of most systems to give thumbs up, applause, and other indicators can also help send the message that you’re paying attention.

The hardest talk I ever had to give was an online conference early in the Covid Pandemic. I had no real-time feedback from the audience at all. I was not told how many people were listening; I could not see any chat messages: no input at all. It was just me, staring at my slides, trying to maintain good energy. Eventually I got questions read to me at the end that suggested at least someone was watching – but for most of my talk I felt like I was talking to an empty room.

Give people input whenever you can without being distracting. Helping them understand they are being heard will make it easier for them to communicate with you.

Listening as a Form of Respect

Truly listening to another person is a marker of respect. You are demonstrating that the other person is worth your time and energy. If that’s not obvious to you already, think about the difference between a friend who is looking at you while you’re talking vs that same friend looking at their phone; which makes it clear your friend cares about you?

At work the same is true with colleagues. If you are looking at your phone, reading email, looking at social media, or any number of other activities that pull your attention away you are communicating the person isn’t as important to you as all those distractions.

We all are guilty of this from time to time. I have been pushing myself recently to admit it to other people because it gets me to stop.

For example, the other day just as I as starting a call, I got a message from someone else that I found very frustrating – and was time sensitive. I started to reply while also starting the call. I wasn’t really respecting my colleague’s time. So I apologized to my colleague, asked for a moment to reply to the message explaining it was both time sensitive and distracting, and then I focused on our call. I was both more focused on our conversation two minutes later, and I avoided annoying her by constantly looking away at the other message. Because she listened to me, it also meant we could restart our conversation by commiserating about distracting messages that pull our attention away from meetings.

Communicating well requires full engagement in the work, but in the messages you send and in making sure you receive messages as well.

As I said in my first post on this topic, communications skills for developers and consultants is an enormous topic. The plan for this series is evolving as I go. If you have suggestions or requests feel free to leave me a message.

Knowing When to Ask for Help

One of the skills everyone needs to have is asking for help. Whether that’s in our work, our education, or our personal lives, we all need help from time to time. We are focused on work here, but this same basic rules apply in all aspects of our lives.

The right time to ask for help is, like so many things, a balancing act. Struggling through a complex issue can be a great way to learn something new. But often we can short cut that learning by simply asking the right questions at the right time.

On the flip side, if we ask too early not only do we risk missing a chance to build deep understanding, we also risk frustrating colleagues by asking them to do our job.

One short cut for when you need to ask for help is if another team member asks if you have already asked. Generally, I want to have called for support before my PM suggests it. By then they are frustrated that I haven’t already solved whatever the issue is solo.

Signs You Might Need Help

Given my current role and skill set, I’m often the person who gets called when a project goes sideways. That means I see a lot of places where someone didn’t call for help until they were in crisis. While that’s going to happen to us all from time to time, it’s better to call for help when the problem is small. If you want until the project starts burning down around you, it’s way too late.

You might need help if:

  • You have absolutely no idea what to do next.
  • You are about to re-design a large portion of your project to get around a challenge.
  • You have spent more than a day pounding on a problem without success.
  • You are avoiding working on a task, because you don’t know how to get started.
  • You are about to use a mode/tool/technique that everyone says is a bad idea.
    • In Salesforce that can mean things like:
      • loading data in serial mode
      • setting batch size to 1
      • using view all data in your tests.
    • In Drupal that can mean things like:
      • hacking a module
      • loading data in the theme layer
      • writing raw SQL queries

What to do Before Asking for Help

As I said before, asking for help is a balance: you can wait too long, or you can ask too soon. The real trick is hitting the sweet spot.

There are several things you should always do before taking another person’s time.

  • Google It! I kinda can’t believe I have to say that, but not everyone bothers.
  • Make sure you can explain the question clearly. If you don’t know where you got stuck, how can I help you get unstuck? And thinking it through might make the answer obvious.
  • Develop a theory. When asking for help, it can be useful to pose a theory about an approach. Even if you’re wrong it may help me understand your thinking.
  • Try a few things. Experimenting with what’s going wrong can help you formulate your question, and may help me short cut my research if you have eliminated obvious issues.
  • Explain the problem to your dog, cat, rabbit, stuff animal, etc. As someone who spends time being a human rubber duck, I can often tell when someone tried to explain it once already.

Where/Who to Ask for Help

For me, the hardest part is knowing who to ask.

As a consultant I try to avoid asking questions in places clients may see it. Our clients pay for us to be experts, they do not want to see us asking questions in public – particularly if the question has a simple answer.

As a Salesforce MVP, one of my favorite perks is the MVP Slack channel, where we ask each other questions that run the full range of complexity. While access to a community that hard to access, and that advanced, is a privilege there are other ways to find similar groups like your local user group.

I love having a good internal network of people to ask for help. Most of the places I have worked at as a consultant have had some kind of information place to ask questions and help each other out. If you work in a consultancy find or create such a back channel.

If concerns about being seen by clients isn’t relevant to you, check out this list of 7 Salesforce Communities to Join recommended by Salesforce Ben.

Help Build a Helpful Community

The final thing to know about asking for help, is that it’s important to offer help as well. A good question can be valuable to someone else who has the same issue in the future. A good answer is helpful to both the person who asked the question and the person who looks again in the future.

But offering answers, even if not perfect answers, is a great way to learn and encourage others to seek help. Any time I post a question on Stack Exchange, I try to hunt around for one or two to answer as well. That both allows me to pay it forward, it also helps encourage the tone that people can be experts in one thing while still needing help in another.

Smart people need help, and should be comfortable asking for it.

Writing for Developers and Consultants: Know your Documents Types

When I started this series on writing for developers and consultants, I thought of this piece first, but I couldn’t get the ideas to come together. Sometimes it takes a few tries.

Anytime you write something, you should be aware of what kind of document you’re writing and who is it for. The definition of “document” in this context is very broad it could be: an email, letter, solution design, chat messages, blog post, test script, work of fiction, book, poem, presentation, marketing slide deck, scope of work, and so on: anything that involves writing words.

For example, this is a blog post, about writing, meant for people who are developers or technology consultants who may have been told good writing isn’t important.

Common Work Documents

I’m going to put aside poems, novels, and other personal writing forms to focus here on work related writing. Developers need to be able to describe their work to other people. We also need to communicate about what is happening on a project, support one another, and ask for help. We do all these things with words, and often in writing.

In my career I’ve written a wide variety of documents as part of my work. A partial list (because I doubt I can think of everything to create a complete list) includes:

  • Emails
    • to my boss
    • to colleagues or friends
    • to direct reports
    • to clients
    • to large mailing lists
  • Solution Design Documents
  • Scopes of Work
  • Contracts
  • Invoices
  • Test Scripts
  • Conference Talks
  • Research Reports
  • Chat Messages

Some require more detail and longer prose than others. Some are expected to be polished where others can tolerate typos and mistakes. But each has its own style, structure, audience, and expectations that the writer must meet.

A Document’s Purpose

When you start to wring something, know your purpose in writing.

Not all documents are created equal and so understanding your purpose is critical. Are you writing an Solution Design that needs to outline how you plan to solve all the hard problems in a project? Or are you writing an email to your boss asking for a few days off? Is this a research report meant to support an advocacy project or a cover letter for a resume? All of those are important things, but none should be written in the same tone or with the same style.

A Scope of Work (SOW) is a lasting artifact during a projects that sets the bounds of the work you’re going to complete. A sloppy SOW can cost you, or your employer, vast sums of money. A SOW writing purely to defended against those concerns may not express the client’s needs and interests, and result in them refusing to sign.

An email to a client might be a friendly reminder about pending deadlines, or a carefully crafted notes from a contentious meeting. Written well, both could leave you in a better place with your client. Written poorly, both may cause your client to become frustrated with your sloppiness.

If you don’t know why you’re writing something, you are likely to write the wrong thing. At work, if you aren’t sure, ask for guidance.

A Document’s Audience

There is no such thing as a “general audience” you should always have a mental image of who you are writing to, and why.

We all know that it’s important to think about your audience, but we don’t always do this well. In part because determining the audience is sometimes a little complicated.

When your audience is the person or people you are writing to, you need to leverage your understanding of their knowledge, skill set, and project engagement. You want your text to meet them where they are.

Sometimes the audience you care about most isn’t the direct subject of the message, but a 3rd party you know, or suspect, will read the document later. I find this is true particularly in contentious situations.

FOIA Warning

If you work in, for, or with government agencies in the US (and for similar reasons elsewhere as well) – including as a subcontractor – you should understand if your content is subject to a Freedom of Information Act requests. Sometimes your audience isn’t the person you are writing to at all, but the reporter who could read the message 2 years from now after they get copies of everything related to your project. In those settings, don’t put anything in writing you don’t want on the front page of a major newspaper.

But FOIA can also be a blessing for a developer who knows a bad decision is being made. Carefully worded expressions of concern, and requests for written confirmation of next steps, can trigger FIOA-cautious readers to recognize they need to follow your advice.

Finding the Right Level of Technical Detail

One of the hardest things for developers, and other people with lots of technical knowledge, to do well is communicate clearly about technical minutia. There is a balance to be struck between providing transparency and overwhelming readers with details. Developers have to think about details in our work. We also use field specific jargon that can be confusing to people whose work is in other areas.

Too often we confuse that specialized knowledge of our field, with intelligence. I have watched developers lose their audience in the nuances of small details, and come away announcing their audience was a bunch of idiots. Early in my career I was guilty of this as well. Assume you’re audience is as smart as you; they just know different stuff.

When you make that assumption you can avoid talking down to people, and start to work on finding their level.

The right level of technical detail will also vary by document type. When I’m exchanging emails with a client’s in-house developer we go deep into the weeds often. When I’m writing a SOW, the technical detail is nearly absent as we are defining functionality and purpose, not the exacting detail of how that functionality will be delivered.

The more you can be in conversation with the people you’re working with about their background, the easier it will be to find the right level of detail to explain yourself clearly.

Summation

Hopefully by now it’s clear, this is an overview of approach, not detailed guidance. In a future post I plan to write about some of these specific documents types, and how to write them. Hopefully this overview gives you ideas and things to think about as you work on your next document.

As I said in my first post on this topic, communications skills for developers and consultants is an enormous topic. The plan for this series is evolving as I go. If you have suggestions or requests feel free to leave me a message.

Tool Building Mindset

Earlier this month, at Mid Atlantic Dreamin’ in Philadelphia, I gave a talk titled Software Super Heroes: Building the tools you wish you had. My goal with the talk was to convince people that should, can, and in fact do, built tools for themselves. If you work with technology, and your job involves repetitive tasks the same applies to you too.

What do I mean by “Tool” and “Tool builder’s mindset”?

I like to use a very expansive definition of tool: “A tool is anything that makes a task easier which would be repetitive, hard, or impossible without it.” In that sense just about anything you make that simplifies you work can be considered a tool: a project estimation spread sheet, a good set of directions for a complex task, a flow for a Salesforce admin, a piece of code to normalize a large collection of files, and more.

My intention with that expansive view is to help encourage people to take on a tool builder’s mindset.

To be a digital tool builder does not require knowing how to write complex software, it just requires you to do what you already do now, but with intention. When we use a broad definition of tools, it’s easier to see ourselves as tool builders, even if we’re just talking about a spreadsheet or a Salesforce flow meant to handle an administrator’s daily tasks. When we see ourselves as tool builders we are more likely to make something worth using more than once.

Why does this matter?

When we approach problems with a tool building mind set, instead of insurmountable challenges caused by gaps in our tooling, we see opportunity to create something new to make the impossible possible. Instead of facing hours of boring repetitive tasks, we have chance to build a more interesting special purpose solution.

Fight the Tool Building Excuses

There are several excuses I commonly hear from people when I encourage them to build their own tools. They range from concerns about not having the right skills, to assuming someone else already built that tool or that the time required isn’t worth the effort.

My general response to these concerns is that while people should indeed look around for tools that already solve their problem, and that some problems are very hard to solve completely, if you start to chip away at a complex problem you often will find that you can create tools that are good enough to save you time and effort.

Don’t try to build the perfect tool that solves all possible edge cases on your first go. Create a tool that takes out some annoying and repetitive task. Then create a tool that solves for another task, or builds on your first time. Chip away.

I often tell developers who are early in their career that I should never see them doing rote repetitive tasks for hours on end. Instead once they understand how a repetitive task is done, they should start thinking about how to build a tool to take over. But that’s not just advice for developers: we invented computers to do repetitive asks (calculating artillery firing tables and cracking codes), let them do that.

Pick Your Tool Building Path

When you set out to create a tool you have two main options: use something you already know, or use tool building as a chance to learn something new. I’ve used tool building as was to teach myself new features of Excel, Google Sheets, Salesforce Flows, Git, and several programming languages. This can be a great way to learn how to use the tool that’s just right for the job. But learning a new tool or technique takes time, and if you have a deadline you may need to move faster.

Personally I try to take both paths from time to time. I use things I know when: they are exactly the right tool, I am under time pressure, or I want to keep my skills sharp. I will take the time to learn something new when: it’s something I need to learn anyway, I am building on my own time, or it’s exactly the right tool for what I need to do.

Neither path is correct 100% of the time. By using them both I am able to create the tools I need, and broaden my skills over time.

Just Start Building

The next time you’re faced with a task that is repetitive or hard with the tools you have: create yourself something new. Don’t get hung up on being perfect, just create something that’s better than what you have at the start.

Then save your tool to use again later. Share it with colleagues, friends, or as an open source project.

When in doubt, just start building.

Salesforce Github Actions

I started this post back in November, but got rather distracted last month.

I have been wanting to setup a CI pipeline for Salesforce scratch orgs for a long time. The documentation out there isn’t great, and it’s taken me awhile to get around to powering through the details. For testing that my scratch org configurations for Education Cloud and Nonprofit Cloud to work properly I finally bit the bullet and setup a Github action.

What you’ll need

  1. An SFDX-style project on Github that you want to setup for automated testing that includes a Salesforce scratch org.
  2. An org with Devhub enabled. I recommend using a production org for this, not a developer org because of the higher scratch org limits. There are no good reasons not to enable Devhub.
  3. A working install of sf cli with a connection to that devhub-enabled org.

Setup Github Secret

For your action to work it will need to use your connection to your Salesforce Devhub. Salesforce CLI stores the needed key on your local machine, which includes tokens to open the org. You will need to put those keys into a Github secret for proper security.

Note: Should that key ever be compromised, they attacker will be able to open the org as the same user. I suggest you consider using a dedicated user with either a Free Limited Access License, or another similarly restrictive set of permissions. These users are designed to avoid exposing data if they are compromised (they are also free, which has some upsides). That said, you can get yourself started with any user that can access to Devhub objects and then switch out to something more restricted later.

To get the key from sf cli, run sf org display -o [your devhub alias] --verbose where [your devhub alias] is the name of the connection you selected when setting up the connection. The output of that command will include: “Sfdx Auth Url”, that is the value you need in your Github secret.

  1. In Github, go to your repository’s settings, expand Secrets and Variables from the left menu, and select Actions.
  2. Create a new Repository secret.
  3. Name the secret DEVHUB_SFDX_URL
  4. Copy and Paste the Sfdx Auth Url value into the Secret field.

Create the Github Action

The full details of Github Actions are a deep topic, as are the full capabilities of sf cli for testing. So I’m going to focus on setup of an action the creates your scratch org. From there you can expand your workflow as you need.

In your project root create a .github folder, and workflows folder within if you don’t already have them. In the workflows folder create a file called buildScratch.yml.

Copy the following code (explained below) into your file:

name: test run scratch

# Definition when the workflow should run
on:
  # The workflow will run whenever an event happens on a pull request
  pull_request:
    types: [opened, synchronize]

jobs:
  validate_scratch_deploy:
    runs-on: ubuntu-latest
    steps:
      # Install Salesforce CLI
      - name: "Install Salesforce CLI"
        run: |
          npm install @salesforce/cli --location=global
          nodeInstallPath=$(npm config get prefix)
          echo "$nodeInstallPath/bin" >> $GITHUB_PATH
          sf --version
      # Checkout the code in the pull request
      - name: "Checkout source code"
        uses: actions/checkout@v3
      # Load secret for dev hub
      - name: "Populate auth file with SFDX_URL secret"
        shell: bash
        run: "echo ${{ secrets.DEVHUB_SFDX_URL}} > ./SFDX_URL_STORE.txt"
      - name: "Authenticate with dev hub"
        run: sf org login sfdx-url -f ./SFDX_URL_STORE.txt -a devhub -d
      # Create a scratch org
      - name: "Create scratch org"
        run: "sf org create scratch -d -f config/project-scratch.json -a our-scratch-org --duration-days 1"
      # Deploy Project Manifest
      - name: "Deploy Metadata"
        run: "sf project deploy start --manifest manifest.xml --target-org our-scratch-org"

Action Breakdown

The first few lines are common to all actions, it gets a name, then a set of conditions to trigger the workflow. In this case we’re calling our workflow “test run scratch” and it will run when a Pull Request is opened or gets new commits.

The jobs section is the more interesting bit. We tell Github to create a virtual machine using the most recent version of Ubuntu Linux. Next we install Salesforce CLI onto that virtual machine. Once that’s done, we tell it to checkout our code from Github onto this virtual machine. With all our tools in place we’re ready to start the real work.

The next two steps extract the Github secret we defined earlier into a file on the virtual machine and use that file to authenticate to your Salesforce devhub. All that work gets this temporary virtual machine into the same position as your personal device probably was when we started.

The last two steps create the scratch org based on a hypothetical scratch org configuration file and gives the scratch org a short life of one day. Finally deploy your project’s manifest-tracked metadata. This last step could use any version of the deploy command. It could also be added by more steps to deploy other metadata, run tests, or anything else you want to have happen.

Closing Thoughts

Building from this point you can do all kinds of things. For example, if you don’t need to gain access to the org itself, you can include a step to delete the scratch org when you’re done to help avoid the active scratch limit.

You’ll want to pay attention to the limits of your org to see if you need to tweak the triggers of your workflow. If you aren’t using a production org you scratch limit is only 6 per day, and three at a time; I blew through that testing the steps in this article. Even larger orgs only have 200 per day. So be thoughtful about when your action runs, and how often you clean up.

As always, if you find a flaw in my solution please let me know. I’m always interested in making these better.

Salesforce Nonprofit and Education Scratch Orgs

During the recent Open Source Commons sprint in Chicago, I tried to create scratch orgs for nonprofit and education clouds. Despite having some of the best people in the market in the room, including two Salesforce Solution Engineers, two levels of their bosses, and of course Google, I couldn’t figure it out.

As a follow up to a conversation there, Larry Fontillas sent me links to the help docs that contain what I consider partial answers. While I’ve sent feedback to help improve those articles, I am posting my current solution to this challenge.

My Example Scratch Config

On Github I created a repo that contains two scratch org configuration files:

Each is my attempt to create a definition that works for the named cloud. If are new to scratch orgs, I suggest you start with the Trailhead Salesforce DX Quick Start. With a Devhub setup, and connected to your sf cli, you can easily create these scratch orgs from my settings with one of the two following commands:

sf org create scratch -d -f config/nonprofit-cloud.json -a npc-org
sf org create scratch -d -f config/education-cloud.json -a edu-org

Industry Org Scratch Config Breakdown

The two new clouds leve re-usable components Salesforce built, licenses, and deploys across different markets. Salesforce does not currently provide one master switch you must use. Instead you need to know what features to include and tell the Devhub which collection to enable.

That is done in two major parts of the configuration file. In my Nonprofit cloud config file there are several sections, but two are critical: features and settings → IndustriesSettings. The features list includes Salesforce components to enable. In this case I included the nonprofit specific Fundraising, Program Management, and Grantmaking modules, but also OminiStudio, Accounting Subledger, and more because they included with NP Cloud by default. Under Industries Settings you’ll also see I enable Grantmaking and support for Program Management.

The Education Cloud config file has even more detail. That’s because Salesforce as made more available for Education Cloud. The Industries settings section includes more flags as well for the same reason. As I Followed the setup guide for Education Cloud, I further adjusted some of the base-line object permissions.

Here are the features I know you need to include for each cloud:

FeatureNP CloudEdu CloudNotes
AccountingSubledgerGrowthEditionOptionalOptionalStarter Edition is also available
AccountSubledgerUserOptionalOptional
AnalyticsQueryServiceYesOptionalThis is listed in the docs under Fundraising, but I have not yet found a direct description.
AssessmentsYesYes
EducationCloudNoYes (requires a quantity parameter)Main Education Cloud objects, but only a sliver of the features.
EnableSetPasswordInApiYesYesAllows the cli to set the password, you always want this.
FundraisingYesOptional
GrantmakingYesOptional (Rare)
IndustriesActionPlanNoYes
IndustriesSalesExcellenceAddOnYesYesThis is listed in the docs under Fundraising, but I have not yet found a direct description.
IndustriesServiceExcellenceAddOnYesYesThis is listed in the docs under Fundraising, but I have not yet found a direct description.
LightningSchedulerNoYesLightning Scheduler gives you tools to simplify appointment scheduling in Salesforce.
LightningServiceConsoleOptionalYesAllows the Lightning Service Console and access features that help manage cases faster.
MarketingUserYesOptionalProvides access to the Campaigns object.
OmniStudioDesignerYesYesListed in lots of samples, but I have not yet found a direct description. But clearly needed for OmniStudio.
OmniStudioRuntimeYesYesMore for OmniStudio.
OutcomeManagementYesNo
PersonAccountsYesYesWe all love Person Accounts now! Technically this is optional, although the assumption is it your default.
ProgramManagementYesNoEnables the NPC Program and Case management features.
PublicSectorAccessNoYesNot entirely sure about this one, but some of the features for Education Cloud seem to leverage these objects and settings.

Feedback Please!

I have tested these configurations to the degree of seeing that they work as a basic level. But I have not, yet, used them for a serious project. I am confident other people will find details that are missing, or just wrong. Please file an issue on Github or leave me a comment here with suggested changes.

A Salesforce Data Migration Pattern

Loading large amounts of data into Salesforce is a non-trivial exercise. While traditional databases can often be loaded in nearly any order, or with just a few simple considerations for foreign keys, Salesforce’s platform behaviors require several special considerations.

Over the last few years I’ve done a number of large data migrations into Salesforce, and developed a pattern I like to follow. This pattern allows me to load data efficiently at any scale.While the implementation details will vary, you can adapt this pattern to your projects. 

Efficiency matters more the larger your project: for a small project, this is overkill. If you are loading 1,000 Contacts it will probably take you longer to setup my process than just format the file in Excel and load it through Data Loader. But if you need to load 100’s of thousands of records, millions of records, across lots of different objects, this pattern can save hours or even days.

Migration Process Overview

The general concept here, is that you’ll run your migration in two major phases:

  1. Prepare the data in a staging database.
  2. Load the data into Salesforce.
Diagram of a two stage migration, first from the source data into a Salesforce staging database, and then from the staging database into Salesforce.

Salesforce Schema Mirror Staging Database

The key to this process is that staging database in the middle. 

In my experience having a database that is a clone of Salesforce’s schema allows you to fully prepare the data prior to loading. It also gives you a source of truth when handling partially loaded data.

Salesforce is slow to load compared to most traditional databases. By having a staging database you can load fast, gives you a chance to insert steps into your process that are hard in other contexts. These steps allow for testing, speed-enhancements, and error recovery.

Some ETL tools make a staging database easy to build, others do not. If you aren’t sure how to build such a database (or it seems like a huge effort to re-create all those tables), you can use Salesforce2Sql – that’s why I created it. It will clone your Salesforce org’s schema into any of its supported databases.

Testing and Error Recovery

The staging database lets you test for errors after you do your initial conversion; before you load it into Salesforce. You can leverage reporting and scripting engines designed for that database. You can log and error trap during your loading process far more gracefully than the Salesforce APIs support by default.

I often add one more table than just the objects: a logging table. This allows me a place to write the rows from Salesforce error files, and also log the time it takes for each process to run. I can see exactly what errors my process encounters at the record level during testing, and measure the running time.

This database will also give you a place to trace what has, and has not, been loaded into Salesforce. More about how to implement this and drive performance to come.

Transform the Data

Using the tool of your choice, create a process to transform the data from the source data into your staging database. How you do this stage could be a series of posts by itself. For my ideas on a good process for this I suggest my Queries on Queries talk.

Your process will have a mountain of small details – I often describe it as “hard and boring”. Done well this is your best point in the process for testing your work. Test thoroughly! You should run this process so many times you lose count.

Salesforce Migration Keys 

One important detail is that you will want to leave the main record Id field null. Your legacy Id goes into a legacy Id field, but the main Id field should be empty. We’ll use that in the loading stage to determine which records were successfully loaded and which need follow up attention.

Every object you are migrating should have a legacy Id field that links back to your source database. These should generally be text fields, set to be external Ids and unique. These fields will both help with the migration itself, but also the validation process – and should you need to, you will be able to update the data post-migration using those same keys.

To handle references between records use the legacy Ids as the lookup Id values. For example, on a Salesforce Contact there is an AccountId field to reference the parent account. The Account’s legacy Id should be in AccountId. Often this value is already in your foreign key fields so it can be a real time saver in your transformation build. We’ll see in a minute how we use those to resolve to new Salesforce Ids as we load data.

Data Cleaning

This is also the time and place to do whatever data cleansing you plan to do in your process. You can do that work post-launch as well (mostly). I highly recommend this cleansing be automated for large data sets. If you can’t automate it, do it pre-migration in your old system, or post-migration in Salesforce.

Pre-Load Data Validation

Using the staging database your transformed data can be fully validated before you load it.

  • Check your references: Make sure all your lookup fields are populated with valid data. 
  • Check your record counts: Do you have the expected number of records in every table? 
  • Check your critical fields: All data points are created equal, but some are more equal than others. Check those a few extra times.

If you have the time and resources, you can write scripts and other automations to run these tests for you. The more the better.

Loading Salesforce

Finally, all that data you just transform and staged is ready for high volume loading. For each object you run two steps:

  1. Insert the data via the Bulk API (Insert not Upsert!), record the start and end time and all errors in your log table.
  2. Update the records in your staging database to add the new Salesforce Id into the source record’s Id column (the one I told you to leave blank before).

When there are no null values left in the Id column, you have loaded all your data. If there are records that refuse to load, for any reason, you will know because the Id will be null. If you logged the errors you can see why.

You will also use those Ids in later jobs to update the reference Ids. Remember, we put the legacy Id into your reference fields, when you actually load the data you need to replace that legacy Id with the actual Salesforce Id.

When possible you should build these load jobs to only load records without a Salesforce Id already assigned. That will allow you to safely re-run the job if it encounters errors that lead to partial success (like record locking, see below).

Why Not Upsert?

People used to loading small amounts of data will be tempted to use Salesforce’s upsert command. The benefit is that it allows you to use those legacy Id values directly instead of swapping for the newly generated Id. But as record volumes grow, upsert performance drops – I’ve had projects where I measured it at ⅓ the speed of insert, I heard of projects where it got far worse than that. The larger the dataset, the more important it is to use Insert.

Playing Nice with Salesforce

To make sure your data loads correctly, and efficiently, there are three more important details you still need to plan for: 

  1. Automations and Sharing Rules
  2. Object Load Order
  3. Record Load Order

Automations and Sharing Rules

Automations take time to run, even small amounts of time add-up when loading large amounts of data. To the degree possible, you want automations off. Some automations you want to replicate in your transformation process – particularly if it’s a simple field value or record creation. Some automations you want to defer and run later, like custom roll up values via DLRS, NPSP rollups, or similar approaches. And some automations you cannot disable at all.

Sharing calculations in Salesforce are really a special-purpose automation. Just not one you often think about unless you’re doing manual sharing. Like all automations in Salesforce, the more data you load, the larger the impact of these calculations. Salesforce allows you to defer these calculations and run them in the future. The more complex your security setup, the more impact this will have (open security models can generally ignore this consideration).

The person doing the data loading needs to work with the folks that implemented those automations to map out which can be disabled, which can be deferred, and which must to be tolerated.

Object Load Order

In Salesforce, object load order is critical. You cannot disable or defer assignment of required references. So you need to understand the object hierarchy and relationships.

Generally you start with objects that have no dependencies: e.g. Account, Campaign, Product, Lead.

Then proceed to objects that have relationships to those: e.g. Contact

Then to objects that can have relationships to objects from that previous layer: e.g. Opportunity, Account Contact Relation, Campaign Member

When possible, test running two objects in parallel. What exact combination is most efficient will vary by org details and data volumes. My experience is that you will be able to run objects in 4-5 groups usually with two or three objects loading in parallel.

Ideally we’d just load records and not have to go back and update, but if there are circular references, or record hierarchies you’ll need to update records after insert. Plan that second pass into your sequence.

Users

Salesforce Users are a special case. If you have a security model where record ownership is important, you need to load Users first.  If you have an open security model, I recommend loading Users last – and the smallest number of Users possible.  Remember, Salesforce bans User deletion, so you must be as careful as possible about loading them.  I never like to load Experience Cloud Users if I can avoid it – 1,000’s of accounts that will never be used but cannot be deleted is sub-optimal.

Record Load Order and Record Locks

Salesforce has aggressive record locking to deal with concurrent edits and updates across relationships. Great for day-to-day operation; frustrating when you’re loading data.

The first place people often encounter this is when they go to load Opportunities. Opportunity bulk load can run into massive problems with Account records being locked because another Opportunity is being loading for the same Account in a parallel process. If you sort the records by the locking parent record you can often reduce, if not eliminate, your record locking issues.

Use Serial Mode only as a last resort. Serial mode is ⅕ the speed of Parallel mode most of the time. There are situations that call for it. But it should never be your default go-to solution. Try everything else first before resorting to serial mode. Since you have tracking of which records were loaded or failed, if you design your load job carefully you can just re-run to resolve small numbers of record locks.

Extra Sorting Trick:

It turns out, in many cases the way data gets entered over time will gather it in useful patterns. So sorting data by a date field can radically reduce record lock contention. If you cannot figure out what field to sort by (often because sorting by field 1 causes locking issues on another object) try sorting by a date field and see if that helps.

Warning: depending on your data patterns, it can make the problem vastly worse too.

Mock Runs

A mock run is a test load into a sandbox that should involve you going through all the steps to load the data – starting with extracting it from the source system.

I personally recommend at least two full test mocks of your process.

If you’re working on a tight budget that may not be feasible (migrations are the first place project leaders trim budgets, and the first place users complain about errors), but that doesn’t mean multiple tests aren’t valuable.

The first test will go poorly, but you’ll learn a lot. The second test will, hopefully, go far better, but you will still learn a great deal. 

In your testing you should expect to find places where your mappings are wrong, your transformations are incorrect, your testing is inadequate, your load order doesn’t work, you have source data patterns not accounted for, and more. Make time for good testing, you’ll thank yourself later.

Final Considerations

Large volume data loading in Salesforce is a deep topic. For all this is a long article, I’ve left out a lot of details. I designed this pattern to support high speed loads, rigorous testing, and error recovery. But within each of step of this pattern I could write articles this long or longer. You should continue to research the topic and adapt your implementation to your project.

A few sample topics you might consider:

You may even need to do something I’ve never encountered before.

But in any large volume Salesforce data load, the general pattern outlined here will serve you well.