A couple weeks ago I needed to create a Salesforce Lightning Web Component (LWC) that pulls values from URL parameters. While the process is very simple it turns out the vast majority of examples on the web are out of date due to a security update Salesforce made sometime last year – and so I spent a frustrating afternoon throwing ideas at the wall until a colleague stumbled into a comment on a blog post that was an incorrect example by a highly trusted expert noting the needed fix. So, in the hopes of shortening the search for anyone else trying to get this to work, I’m offering an example that works – at least as of this writing.
To be fair the official docs are correct but it is easy to look passed an important detail: if you do not put a namespace on your value the parameter will be deleted.
That change was the security update, before that you could have any value as your parameter name now you have to have __ (two underscores) in the name. Officially the docs say that in the left side of those underscores you should have the namespace of your package or a “c” for unpackaged code. As far as I can tell at least in sandboxes and trailhead orgs you can have anything you want as long as there are characters before and after the __ (which kinda makes sense since package developers need to be able to write and test their JavaScript before they build their package).
So your final URLs will look something like:https://orgname.my.salesforce.com/lightning/r/Contact/0034x000009Xy5gAAC/view?c__myUrlParameter=12345
Basic LWC
Now with that main tip out of the way on to a full example.
My assumption going into this is that you know how to create a very basic Hello World quality LWC. If not, start with the Trailhead Hello World example project.
1) Create a new component to work with, mine will be very simple to help keep the details clean, but you can fold this into more interesting code bases.
2) Update the component’s meta.xml file to set isExposed to true, and at least a target of lighning__RecordPage (although any target will do if you know how to use it), and configure the target to connect to Contact (although again any settings you know how to use are fine here).
<?xml version="1.0" encoding="UTF-8" ?>
<LightningComponentBundle xmlns="http://soap.sforce.com/2006/04/metadata">
   <apiVersion>50.0</apiVersion>
   <isExposed>true</isExposed>
   <description>Example Lightning Web Componant to read URL parameters.</description>
   <targets>
       <target>lightning__RecordPage</target>
   </targets>
   <targetConfigs>
       <targetConfig targets="lightning__RecordPage">
           <objects>
               <!-- This is setup to run on contact but you could use any sObject-->
               <object>Contact</object>
           </objects>
       </targetConfig>
   </targetConfigs>
</LightningComponentBundle>
3) In your JS file beyond the main LighningElement you need to add imports for wire, track, and CurrentPageReference from the navigation library:
import { LightningElement, wire, track } from "lwc";
import { CurrentPageReference } from "lightning/navigation";
4) Add a tracked value you want to display inside the main class:
export default class Parameter_reader extends LightningElement {
  @track displayValue;
5) Next use the wire decorator to connect CurrentPageReference’s getStateParameters to your own code to get an use the URL parameters:
@wire(CurrentPageReference)
getStateParameters(currentPageReference) {
 if (currentPageReference) {
   const urlValue = currentPageReference.state.c__myUrlParameter;
   if (urlValue) {
     this.displayValue = `URL Value was: ${urlValue}`;
   } else {
     this.displayValue = `URL Value was not set`;
   }
 }
From the code sample above you can see that we’re getting the values from currentPageReferences’s state child object, and then attaching them to our tracked value we created in step four.
6) Update the HTML file to display your value ideally leveraging the SLDS along the way:
<template>
 <div>
   <lightning-card title="Url Sample" icon-name="custom:custom14">
     <div class="slds-m-around_medium">
       <p>{displayValue}</p>
     </div>
   </lightning-card>
 </div>
</template>
7) Deploy all this code to your org.
8) Go to a contact record, and edit the page. Add your new competent to the side bar. Save and activate the page.
9) Return to the record page, the component should appear and say “URL Value was not set”.
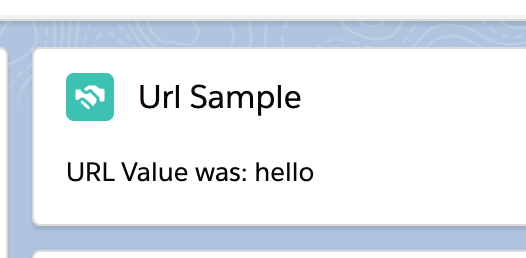
10) In the address bar add to the end of the url: ?c__myUrlParameter=Hello, and reload the page, the component should now read “URL Value was Hello”.

What about sending the value to APEX?
Now, let’s go one step further and send this parameter over the APEX and post a response.
1) Create an APEX class, and create a public static method using the AuraEnabled decorator.
 @AuraEnabled(cacheable=true)
 public static String reflectValue(String value) {
     // Really you should do something useful here.
     return value;
 }
In this case we’re starting with a method that just passes back the same string it was handed, but obviously you can do whatever you want here.
BE CAREFUL ABOUT SECURITY!
If you take an ID as your parameter make sure you are thinking about what happens when someone sends an ID for an object they should not see, is for an object other than the type you expected, and other similar things. The platform can help you but security is your job here, take it seriously!
2) Create good tests for your class, and deploy the code.
3) Import the new function into your JS file:
import reflectValue from "@salesforce/apex/valueReflection.reflectValue";
Update the getStateParameter handler we wrote before to call this function as a JavaScript promise:
  getStateParameters(currentPageReference) {
    if (currentPageReference) {
      const urlValue = currentPageReference.state.c__myUrlParameter;
      if (urlValue) {
        reflectValue({ value: urlValue })
          .then((result) => {
            this.displayValue = `URL Value was: ${result}`;
          })
          .catch((error) => {
            this.displayValue = `Error during processing: ${error}`;
          });
      } else {
        this.displayValue = `URL Value was not set`;
      }
    }
  }
4) That’s it! Deploy your code and reload the page, and your values should pass through to APEX, come back and get displayed.