Announcing Two New Snowfakery Faker Providers

For the last two years I’ve been fortunate to serve as a leader of the Salesforce Open Source Commons Data Generation Toolkit project. That project has produced and inspired a variety of efforts, including Snowfakery and a collection of starter recipes.

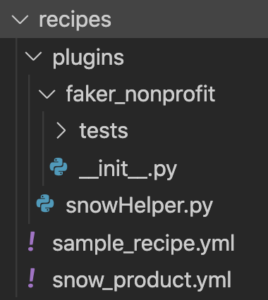
This week, along with my colleague Allison Letts, Salesforce’s Paul Prescod (the creator of Snowfakery), and our fellow project contributor Jung Mun, I helped create two new faker providers for Snowfakery:

What These Faker Providers do

The use of Snowfakery is growing. The more we use it, the more we want the data tailored to specific projects. And the more we find places where the Faker project’s providers do not have quite what we want. In particular the project does not (well did not) have providers for nonprofits and education specific data.

The Nonprofit provider currently just provides organization names:

$ snowfakery snowfakery_nonprofit_example.recipe.yml --target-count 10 nonprofit
nonprofit(id=1, nonprofit_name=Eastern Animal Asscociation)
nonprofit(id=2, nonprofit_name=1st Animal Foundation)
nonprofit(id=3, nonprofit_name=Upper Peace Alliance)
nonprofit(id=4, nonprofit_name=Southern Peace Home)
nonprofit(id=5, nonprofit_name=Unity Home)
nonprofit(id=6, nonprofit_name=Western Peace Home)
nonprofit(id=7, nonprofit_name=Upper History Foundation)
nonprofit(id=8, nonprofit_name=Upper Friends Committee)
nonprofit(id=9, nonprofit_name=Eastern Pets Center)
nonprofit(id=10, nonprofit_name=Northern Animal Foundation)

For the Education provider we have a bit more. You can generate college names, departments, and faculty titles.

$ snowfakery snowfakery_edu_example.recipe.yml
Account(id=1, Name=South Carolina University)
Contact(id=1, FirstName=Roberto, LastName=Stanton, Title=Associate Professor of Microbiology & Immunology)
Account(id=2, Name=French)

The providers can of course run as a standard faker community provider. Once you are setup with Faker just add the new providers with pip:

pip install faker-edu faker-nonprofit

Then you can use the libraries in your code:

from faker import Faker
import faker_edu

fake = Faker()
fake.add_provider(faker_edu.Provider)

for _ in range(10):
    print(fake.institution_name())
from faker import Faker
import faker_nonprofit

fake = Faker()
fake.add_provider(faker_nonprofit.Provider)

for _ in range(10):
    print(fake.nonprofit_name())

How we got here

A few months ago I posted on how to extend Faker to create nonprofit organization names. Allison took that as a starting point to create a similar project to generate names of colleges, departments, and academic titles (and a greatly improved phone number generator but that’s not included since it’s more general). Both of these projects were good proof-of-concept but were rough around the edges. So this week, with Paul’s guidance and Jung’s input, we contributed the more polished versions to the community.

During a virtual working session on Wednesday we restructured the projects, cleaned up code, added sample recipes for Snowfakery, and published them to PyPi. By publishing these as Faker providers on PyPi, and not as Snowfakery plugins, they are available to a wider audience. By having them owned by a larger open source community we are expecting them to enjoy long-term support.

Both are still just getting started. For example the nonprofit one still just generates organization names, but would benefit from job titles, program names, and more. The EDU provider right now just handles colleges, but is expected to generate other education related data in the future. We also have a plan for a third provider to help improve the diversity of the names generated by Faker to make our fake data more representative of real communities.

The Data Generation Toolkit project has been a great example of what happens when you bring people from a wide variety of backgrounds together to solve technical problems. Like the larger Data Generation Toolkit team Paul, Allison, Jung, and I all have different backgrounds, skills, and experiences. By coming together we are able to help each other find better solutions than any one of us would have found on our own.

It’s been an exciting week, and I’m looking forward to more to come.

Snowfakery Custom Plugins Part 2

Last week I posted part 1 of this series on creating plugins for Snowfakery. This second installment covers creating custom Faker Providers to use as plugins for Snowfakery.

Why create a Faker Provider instead of Snowfakery Plugin

Python’s Faker library provides many useful things, but not everything you might want. Fortunately it is designed to be extended, and Snowfakery is designed to help make it possible for those extensions to be project specific when you need to (or when it makes it easier for your team to share recipes).

Sometimes you need to have all the features of a Snowfakery plugin, like maintaining state. But often you just need to kill a gap left by the Faker community offerings. In that case, a Faker Provider may offer longer term benefits like re-usability in other projects, and useful helper functions, that give it the strong choice.

Things you’ll need

You do not need to have reviewed everything in Part 1, but you will want to look at the project structure section and to make sure you have the following tools:

  1. Python 3 (any recent-ish version should be fine), and the experience to read and write simple Python scripts (they aren’t any harder to follow than YML just different).
  2. Snowfakery 1.12 or later. Note: if you have CCI installed it contains Snowfakery but on Windows you may need extra setup.
  3. The Faker module for Python (probably via: pip3 install Faker). Not strictly required but can help you with testing.
  4. A code editor you like that supports both Python and YML (which is pretty much anything good).
  5. You probably want experience working on at least one or two Snowfakery recipes.

Reminder about project structures

In part 1 we build a project around the built-in search patterns of Snowfakery.

Snowfakery looks for plugins in a select number of places:

  • The Python path.
  • In a plugins directory in the same directory as the recipe.
  • In a plugins directory below the current working directory.
  • A sub-directory of the user’s home directory called .snowfakery/plugins.
Recipe directory layout

For this example the plugins directory will live within the folder with our recipe (called recipes), but you can move the plugins directory up a level and it will work just as well.

To get started, in your project create a recipes directory. Next create a plugins directory within recipes. Then create faker_nonprofit directory in plugins. You can ignore the snowHelper and snow_product.yml examples from part 1 in the screenshot on the right, but that’s generally what we’re doing.

Create your first Snowfakery Faker Provider

Faker itself does not have a community supported generator of Nonprofit organization names, and when you work with nonprofits a lot sometimes you need those. That is exactly what we’ll create in just a minute.

In the plugins directory you created in part 1, create a directory for your new provider with the pattern faker_[my_service_name], in my case faker_nonprofit. Then in that new directory create a file named __init__.py this defines the Faker provider Python module.

You can see the full working example here but I’ll walk through the outline.

The file opens by providing a doc string and importing the faker.providers module.

"""Provider for Faker which adds fake nonprofit names, and program names."""
import faker.providers

The next several lines of the faker_nonprofit module provide arrays of words to use in the generation of fake names. Depending on what your provider does this may or may not be useful to you (but it’s very common).

Then we define the Provider itself as a class that extends the BaseProviders class, with whatever methods you want to call:

class Provider(faker.providers.BaseProvider):
   """Provider for Faker which adds fake nonprofit information."""
 
   def nonprofit_name(self):
       """Fake nonprofit names."""
       prefix = self.random_element(PREFIXES)
       suffix = self.random_element(SUFFIXES)
       topic = self.random_element(TOPICS)
       return " ".join([prefix, topic, suffix]).strip()

Those random element selections are from the arrays of words I mentioned a minute ago. Basically we’re just building a name from some selected words.

A note about tests

Unlike Snowfakery plugins, Faker projects have existing patterns for how to setup tests (they are not totally consistent but there are patterns out there). So the complete code on Github includes a testing module as well, and you should consider something similar for yours (particularly if you are considering making it available to the wider community). It’ll allow you to test your provider generically not just when it’s running through Snowfakery.

Linking your Provider to a Snowfakery Recipe

Now that we have a local Faker Provider, we need to connect it to our recipe.

A very simple recipe (in our recipe directory) should demonstrate the output quite nicely:

- plugin: faker_nonprofit.Provider

- object: Account
  fields:
    Name:
      fake: nonprofit_name

Run the recipe through Snowfakery and you can see the name appears believable:

$ snowfakery recipes/sample_recipe.yml
Account(id=1, Name=Southern Unity Community)

The project uses a slightly larger recipe here that uses both plugins and generates more than one object. The full recipe in the repo will create one Salesforce Account object that has a Fake Nonprofit name, a custom field for a Main Service that will be one of our snowy puns, an address, and two related contacts with all their basic information included.

$ snowfakery recipes/sample_recipe.yml 
Account(id=1, Name=Upper Friends Committee, Main_Service__c=Snowmanage, BillingStreet=4773 Giles Plains Suite 878, BillingCity=South Daniel, BillingState=Virginia, BillingPostalCode=34516, BillingCountry=United States, ShippingStreet=7844 Hester Shore Apt. 299, ShippingCity=Maynardview, ShippingState=Indiana, ShippingPostalCode=86323, ShippingCountry=United States, Phone=956.673.3002x471, Fax=+1-786-744-2112x36239, RecordType=Organization)
Contact(id=1, AccountId=Account(1), Salutation=Misc., FirstName=Isaac, LastName=Barr, Email=joypeters@example.com, Phone=+1-808-508-0989x418, MobilePhone=(987)475-7200x8072, Title=Tour manager, Birthdate=1982-03-27)
Contact(id=2, AccountId=Account(1), Salutation=Mx., FirstName=Erica, LastName=Lopez, Email=angel01@example.org, Phone=(011)243-1677x868, MobilePhone=(079)466-5474x52399, Title=Research officer, political party, Birthdate=2000-07-07)

If you have interest in seeing the Nonprofit Provider made into a more complete tool and released as its own project please let me know.

Snowfakery Custom Plugins Part 1

Last November I wrote a bit about creating Salesforce data with Snowfakery.  I’ve continued to use the tool for work, provide feedback to the project maintainer, and help the Salesforce Open Source Commons Data Generation Toolkit Project as we started to build a library of sample recipes. Hopefully I will have more to say on that after the next Community Sprint.

Snowfakery not only gives you a way create carefully shaped relational data sets of nearly any size, it also allows you to create plugins to extend its abilities. those plugins come in two flavors: Snowfakery Plugins, and Faker Providers.

For more technical details you may want to read the project has documentation. My intention here is to provide an end-to-end example of how to make them work.

This article started out as one long piece but to keep it focused I’ve decided to break it into two parts:

  • Part 1 covers Snowfakery Plugins.
  • Part 2 covers creating custom Faker Providers for Snowfakery projects.

The code for both parts is on Github if you want to see the project as a whole.  

Things you’ll need

  1. Python 3 (any recent-ish version should be fine), and the experience to read and write simple Python scripts (they aren’t any harder to follow than YML just different).
  2. Snowfakery 1.12 or later. Note: if you have CCI installed it contains Snowfakery but on Windows you may need extra setup.
  3. A code editor you like that supports both Python and YML (which is pretty much anything good).
  4. You probably want experience working on at least one or two Snowfakery recipes.

Snowfakery Plugin Project Structure

This setup just talks about Snowfakery recipes on their own, not within a larger project, but the concepts are the same even if the details are different.

Snowfakery looks for plugins in a select number of places:

  • The Python path.
  • In a plugins directory in the same directory as the recipe.
  • In a plugins directory below the current working directory.
  • A sub-directory of the user’s home directory called .snowfakery/plugins.
Recipe directory layout

For this example the plugins directory will live within the folder with our recipe (called recipes), but you can move the plugins directory up a level and it will work just as well.

To get started, in your project create a recipes directory. Next create a plugins directory within recipes. Until part 2 you can ignore the faker_nonprofit directory in the screenshot on the right, but that’s generally what we’re doing.

Create Your First Snowfakery Plugin

In the Snowfakery community we use a lot of snow-based puns to name things. So to help create fake sounding products for our projects we might need a simple plugin to generate us new words that match our general naming convention.

In the plugins directory create a new file called snowHelper.py. And copy the follow Python code into your editor:

from snowfakery import SnowfakeryPlugin
 
class SnowPunnary(SnowfakeryPlugin):
   class Functions:
       def snowpunner(self, word):
           return 'Snow' + word

The code here is pretty straight forward if a little nested. We are loading the SnowfakeryPlugin class from Snowfakery itself, and then extending that class to create our plugin. Snowfakery assumes that the plugin has a subclass to hold your plugin functions (called Functions) and that you add your functions to that subclass. Your functions can have a parameter (here the word being punned on) to accept inputs from other parts of the recipe.

Our SnowProduct Recipe

Now we need a recipe that will actually use our plugin. In the recipes directory create a file called snow_product.yml and copy in the following YAML code:

- plugin: snowHelper.SnowPunnary
 
- object: Product
  count: 10
  fields:
    Name:
      SnowPunnary.snowpunner: ${{fake.word}}

In the first line we load our plugin using Python’s module naming convention – because it is getting loaded as a Python module. The pattern here is the file name (without file extension) then the class name. In the last line we then call the plugin’s function by referencing the class name and the function name.

You can run the file directly in Snowfakery and see the outputs:

$ snowfakery snow_product.yml
Product(id=1, Name=Snowplantary)
Product(id=2, Name=Snowbadary)
Product(id=3, Name=Snowmillionary)
Product(id=4, Name=Snoweffortary)
Product(id=5, Name=Snowgreenary)
Product(id=6, Name=Snowbehaviorary)
Product(id=7, Name=Snowcouldary)
Product(id=8, Name=Snowforceary)
Product(id=9, Name=Snowyesary)
Product(id=10, Name=Snowcompanyary)

I’m going to show, but not go into great depth on, one more detail: plugins can save state. Snowfakery provides a mechanism for tracking context variables between calls that allow you to track current state. So we can have ours count the number of times the snowpunner function has been called and return that count in another function:

from snowfakery import SnowfakeryPlugin
 
class SnowPunnary(SnowfakeryPlugin):
   class Functions:
       def snowpunner(self, word):
           context_vars = self.context.context_vars()
           context_vars.setdefault("count", 0)
           context_vars["count"] += 1
           return 'Snow' + word
 
       def currentCounter(self):
           context_vars = self.context.context_vars()
           return context_vars["count"]

Then update the recipe like this:

- object: Product
  count: 10
  fields:
    Name:
      SnowPunnary.snowpunner: ${{fake.word}}
    Index:
      ${{SnowPunnary.currentCounter()}}

Notice that to call the function without a parameter we use the formula syntax.  Run it again and we see the new index that shows the count:

$ snowfakery snow_product.yml
Product(id=1, Name=1: Snowimpact, Index=1)
Product(id=2, Name=2: Snowfund, Index=2)
Product(id=3, Name=3: Snowdark, Index=3)
Product(id=4, Name=4: Snowteach, Index=4)
Product(id=5, Name=5: Snowteam, Index=5)
Product(id=6, Name=6: Snowsummer, Index=6)
Product(id=7, Name=7: Snownew, Index=7)
Product(id=8, Name=8: Snowperform, Index=8)
Product(id=9, Name=9: Snowonto, Index=9)
Product(id=10, Name=10: Snowmodel, Index=10)

It is important to remember that while it would be possible to add a value to the context variable on each iteration, that would cause Snowfakery to consume more memory on each iteration. Snowfakery is designed to generate records by the hundreds of millions if asked, and does so while consuming very little extra memory – you can do things in context variables that would break down on larger runs.

In part 2, I talk about creating a custom Faker Provider and loading it into a Snowfakery recipe.

Generate Sample Data for Salesforce NPSP

Snowfakery is a fairly new tool from the team at Salesforce.org. It is designed to generate any amount of arbitrary relational data you can cook up. The Salesforce Open Source Commons Data Generation Toolkit Project has been starting to work on including it in our work (you can read more about my relationship to these projects on the Attain blog) and as part of that, and as part of my actual day job, I’ve been playing with its recipe language, reviewing the documentation, and generally trying to make sure I can use it well.

Snowfakery itself is excellent, but since it’s new there’s a lot of work left to be done on the documentation. The existing docs focus on the generic ways you could use Snowfakery and outline all the features, but I often need it to create very specific things: data for Salesforce orgs with NPSP installed for our nonprofit clients, and the docs aren’t currently great at getting you started at doing that – this post is intended as partial filler in that gap.

The recipe provided here is based on what I’ve learned from my first real successes getting Snowfakery to work on a real-world project.

It give credit where due my first real break through was when Snowfakery’s creator, Paul Prescod, pointed me to a branch in the repo that had some starter NPSP examples. Paul’s samples are helpful but are incomplete and not super well commented. While my solution leverages his work, it simplifies things and takes some short cuts. My goal is functional and understandable, not perfect.

This recipe creates 30 gifts, 20% from companies, 80% from households. They are spread randomly over a set of preexisting Campaigns, and create the needed Accounts, Contacts, Opportunities, and Payments.  It also assumes you are generally comfortable with the major NPSP objects.

This solution is assembled from three files. The main recipe file snowfakery_npsp_basic_recipe.yml for the objects you want to create, and two layered macro files which are used to generate often repeated objects, npsp_macros.yml, and sf_standard_macros.yml. Both are modified from the versions in the example branch of the repo. The Standard Salesforce objects macro file is derived from this one and the NPSP objects recipe macro file is derived from this one.

The code all of them is in a gist, and embedded below (they are numbered in the gist to control display order, remove numbers before actually using). There are inline comments to explain their details. Once you have local copies of all three files (and have Snowfakery installed) you can generate a JSON file that matches the data described:
$ snowfakery --output-format=JSON --output-file gifts.json snowfakery_npsp_basic_recipe.yml

If you are using CumulusCI for your project, you can have CCI load the data directly into your org:

cci task run generate_and_load_from_yaml -o generator_yaml ./datasets/snowfakery_npsp_basic_recipe.yml -o num_records 30 -o num_records_tablename Account --org my_project_sandbox